Day 3 | App Runtime
- An overview of the App Platform and App Runtime toolset
- The philoshopy behind AppRuntime hooks (imperative vs declarative)
- Use Alerts and Config service
- Use Data Service: Lookup specific APIs and convert the API requests into queries and mutations
- Test queries and mutations in the playground
- Use
useDataQueryanduseDataMutationhooks - Other advanced use cases for the Data Service hooks (dynamic queries, refetching, lazy mode etc..)
Agenda
| Time | Topic | |
|---|---|---|
| 09:00 - 10:30 | Opening Workshop | Overview and Basic Hooks (useConfig and useAlert) |
| 10:30 - 11:00 | coffee break | |
| 11:00 - 12:30 | Workshop | App Runtime: API overview, Query Playground and Data Queries |
| 12:30 - 13:30 | lunch break | |
| 13:30 - 15:00 | Workshop | App Runtime: Mutations |
| 15:00 - 15:30 | coffee break | |
| 15:30 - 16:30 | Workshop | App Runtime: Advanced Data Queries |
| 16:30 - 16:45 | Closing | |
| 16:45 - 17:00 | Q&A (with French support) |
Presentation
instructor note: We will go through the presentation in four parts: the AppRuntime overview and basic hooks, data queries, data mutations, advanced data queries.
Overview and Basic hooks
Task 1.1 - useConfig
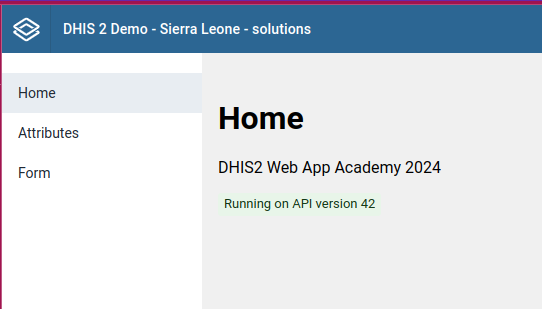
Get the DHIS2 configuration using useConfig hook and show the API version on the home page similar to the screenshot below (look up the correct UI component).
- Hint: Lookup the correct UI component in the documentation, and don't forget about internationalisation (if you've set it up in the previous day)
The expected result
Task 1.2 - useAlert
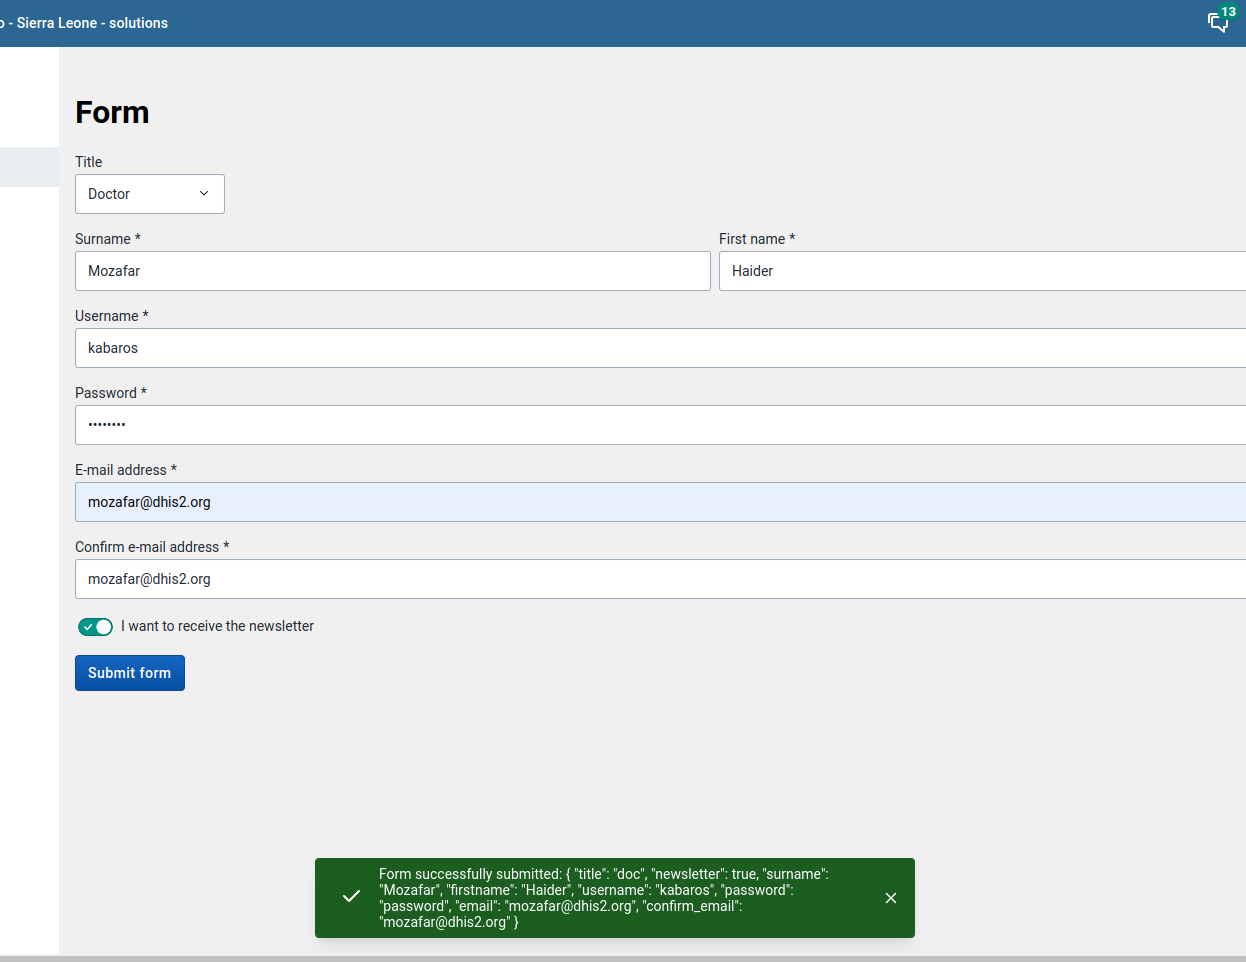
Replace the alert in the Form view with an alert from the UI library. You should use the useAlert hook which wraps the UI component and makes it easier to a DHIS2 application.
The expected result
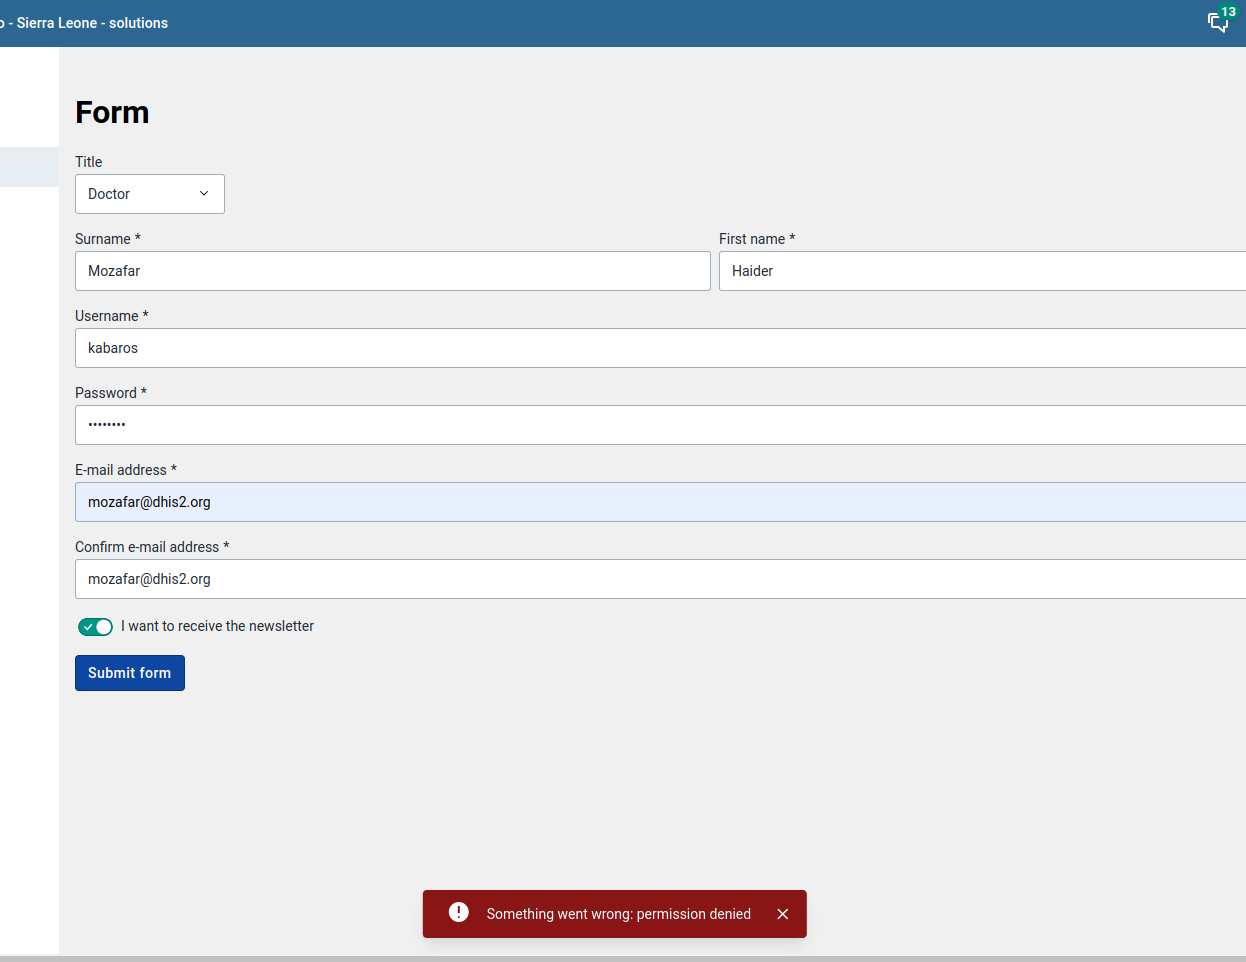
You should display a success message with the stringified values of the form (similar to what the alert used to show previously).
You should also handle the error state. For this exercise, you can simulate an error in the code.
Data Queries
instructor note: Overview of the API and how to convert an API request to a query, and demonstrate the Query playground.
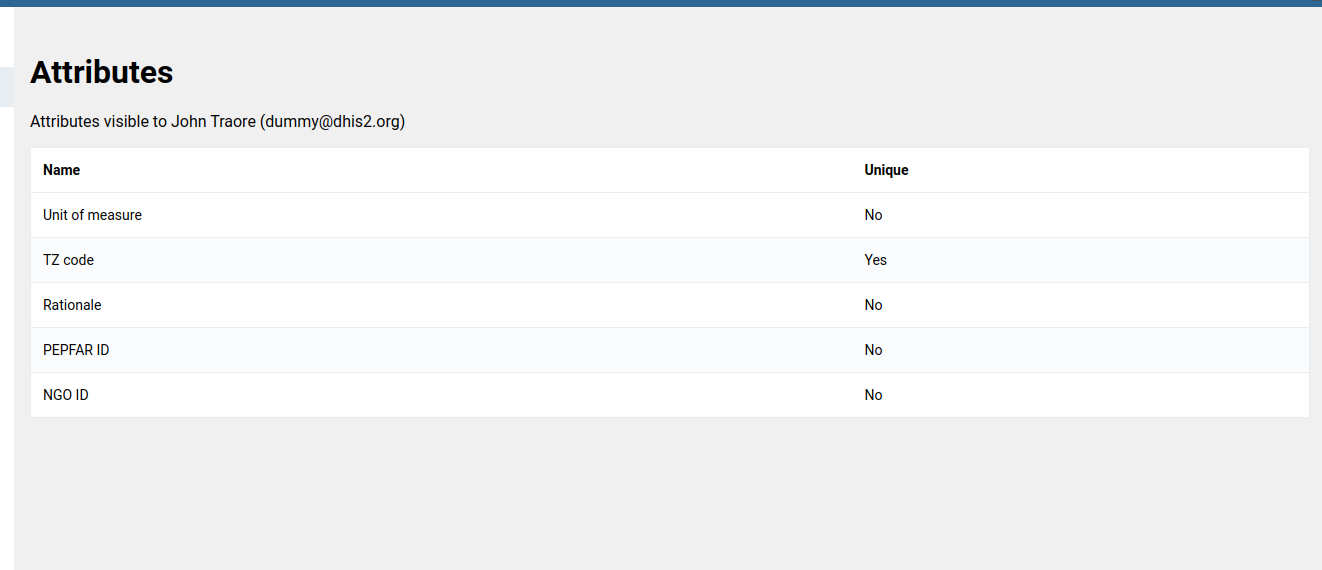
Task 2.1 - Get list of Attributes (useDataQuery)
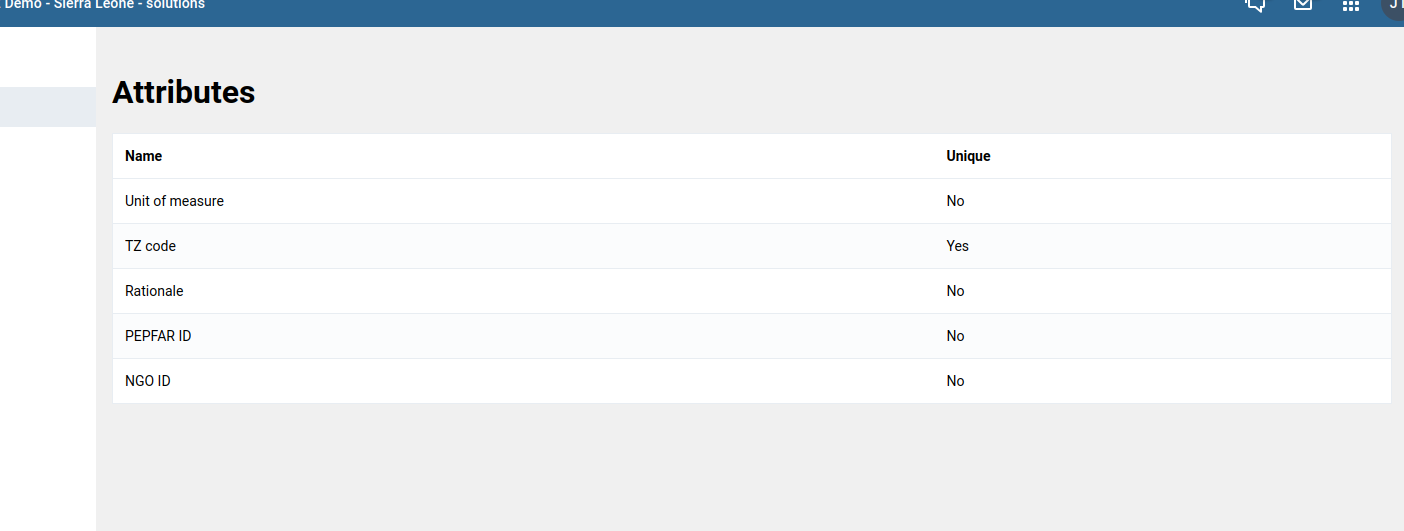
Replace the hardcoded list of attributes with the list of attributes from the API. For the API call, we want to:
- only display 5 attributes per page
- order by
displayNamein descending order
The expected result
The expected result should not look much different except that it's in the reverse order and displaying a smaller number of attributes. The result should be coming from the API rather than the hardcoded list.
Task 2.2 - Get user info (parallel queries)
Add a query to get the current logged in user info, and show their name and email.
The expected result
On top of the table, show the current user displayName and email. This information can be retrieved from calling api/me endpoint (but you should use the same data query for attributes for this exercise).
Mutations
instructor note: Show examples of create, update, and delete mutations in the Query playground.
Task 3.1 - Create Attribute (useDataMutation)
- Under the attributes table, add a form to create a new attribute.
- Show an Alert when the form is updated successfully.
- Show an error message when the form submission errors (for example, if the attribute name is not unique)
The list of Attributes is not automatically updated after a new Attribute is created, ignore that for now. We will work on automatically refreshing the list in the next section.
Tip:: change the order of the Attributes in the table to be sorted by order: 'created:desc' in order to see the newly created attributes at the top of the table.
In the case of errors, we're just showing the general error message returned from the API. Inspect the response, and you will see that the error details exist in the returned object. As a bonus, update the error displayed to get all the list of errors and display them in the Alert.
The expected result
You should create the form under the attributes list. Hardcode the list of Value Types to TEXT and NUMBER. On submit, if the creation succeeds show the success Alert below (with the ID of the created Attribute)
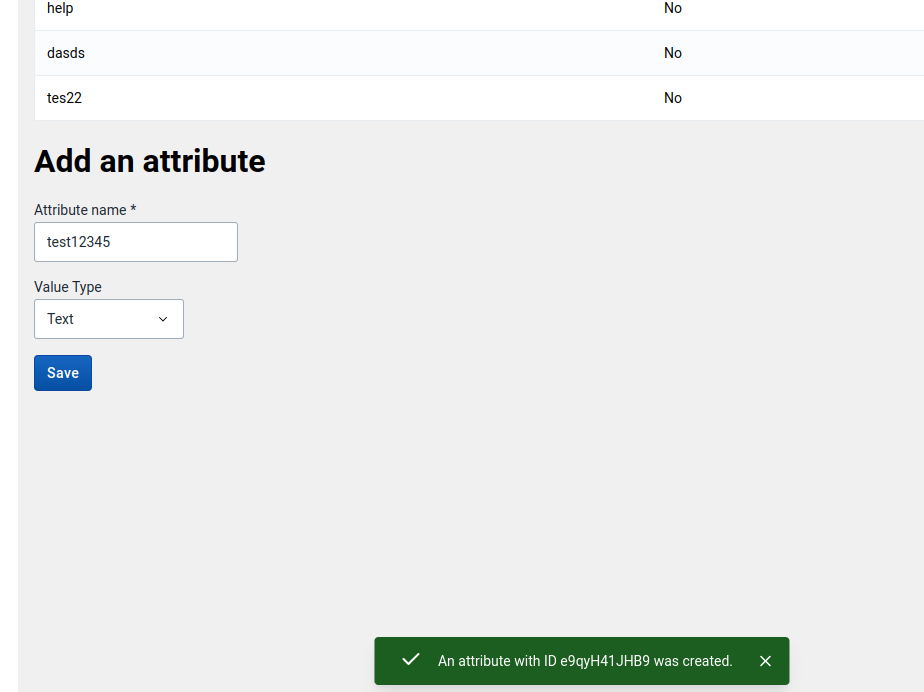
Here is the code for the Create Attribute form to get you started quickly. Add it to your project, and reference the component to display under the Attributes table (src/views/Attributes.js)
import i18n from '@dhis2/d2-i18n'
import {
    Button,
    InputFieldFF,
    hasValue,
    ReactFinalForm,
    SingleSelectFieldFF,
} from '@dhis2/ui'
import React from 'react'
import styles from './Form.module.css'

const { Field, Form: RFForm } = ReactFinalForm

const AttributeCreateForm = () => {
    const onSubmit = async (values) => {
        // @todo: add the mutation
    }

    return (
        <div>
            <h1>{i18n.t('Add an attribute')}</h1>

            <RFForm onSubmit={onSubmit}>
                {({ handleSubmit }) => (
                    <form onSubmit={handleSubmit}>
                        <div className={styles.row}>
                            <Field
                                required
                                name="name"
                                label={i18n.t('Attribute name')}
                                component={InputFieldFF}
                                validate={hasValue}
                            />
                        </div>
                        <div className={styles.row}>
                            <Field
                                name="valueType"
                                label={i18n.t('Value Type')}
                                component={SingleSelectFieldFF}
                                className={styles.title}
                                initialValue="TEXT"
                                options={[
                                    {
                                        label: i18n.t('Text'),
                                        value: 'TEXT',
                                    },
                                    {
                                        label: i18n.t('Number'),
                                        value: 'NUMBER',
                                    },
                                ]}
                            />
                        </div>

                        <div className={styles.row}>
                            <Button type="submit" primary>
                                {i18n.t('Save')}
                            </Button>
                        </div>
                    </form>
                )}
            </RFForm>
        </div>
    )
}

export default AttributeCreateForm
If the submission fails, for example, in the case of a duplicate name, then show an error message with the error received.

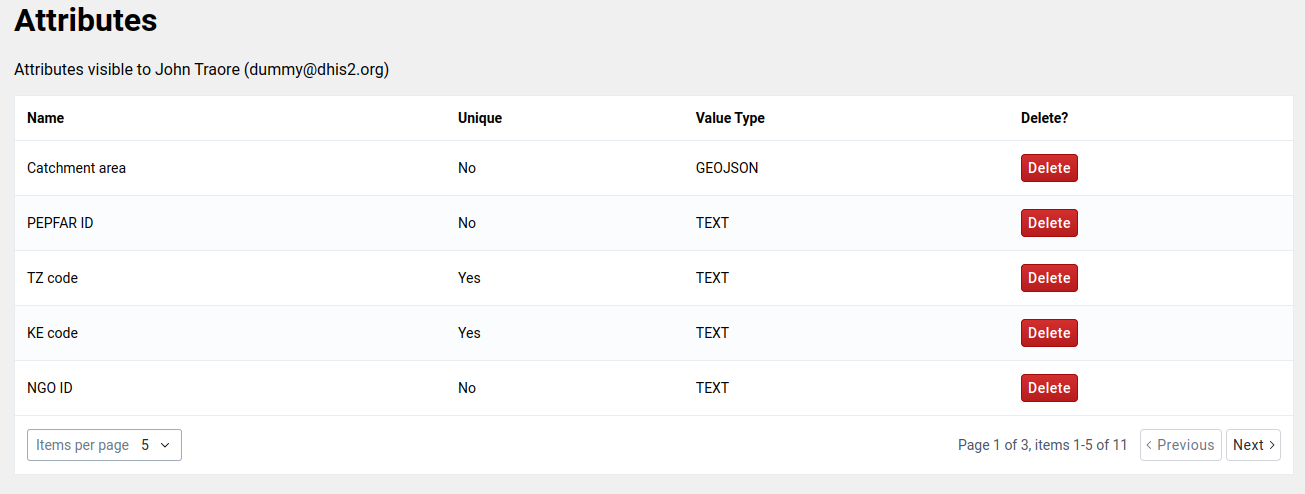
Task 3.2 - Delete Attribute (and refresh)
- Add a delete button in the tables' rows to delete an entity using a Delete mutation.
<Button small destructive disabled={loading} onClick={onClick}>Delete</Button>
- Refresh the list of Attributes after an item is deleted successfuly.
Tip: Check out the Data Mutation tutotial from our documentation for an example of how to implement a Delete mutation.
The expected result
Advanced use cases
instructor note: Live code the advanced query options.
Task 4.1 - Pagination
- Implement ability to go through the pages of the Attributes list.
- Implement ability to change the page size.
- Tip: Look at the Pagination component (and the demo link at the end).
The expected result
A paginator should be added to the bottom of the table and its initial values should reflect the number attributes returned by the API. It should respond to any change to the page size or page number and show the correct data.
Solutions
Look at this commit. Note that most of the properties required by the <Pagination> component are returned by the pager property returned by the api response.
Task 4.2 - Show Attribute details
- When the user clicks on a row, show the rest of the details of the attribute.
- You can just dump the JSON returned for now (or design in a nice UI if you prefer).
Solutions
Look at this commit. The solution here outputs the data in JSON format.
Task 4.3 - (Bonus) Update Attribute
This application supports creating and deleting attributes, but it doesn't support renaming them. This is your task:
Add an Update button to each row in Attributes.js. This Edit button should open a Modal component (from @dhis2/ui) which contains a form. That form should allow the user to type a new name for the selected Attribute. When submitted, the form should use a Data Mutation to send a POST request updating the visualization's name. The modal should then disappear and the table of visualizations should refresh to show the updated name.
Solutions
Look at this commit. Most of the logic for the new update and modal can be found in the UpdateModal.js file.